Setting up Cisco SG300
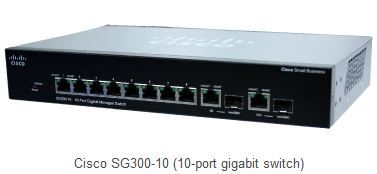
In this chapter, we will use the Cisco SG300-10 as an example of the configuration procedures for setting up a network switch. This switch is a 10-port managed switch that is suitable for a small-scale network. Among the relatively low-priced switches that are available, this switch is a good choice that is suitable for use in a Dante network. Depending on the size of the network, you could also choose the SG300-20, which has 20 ports.
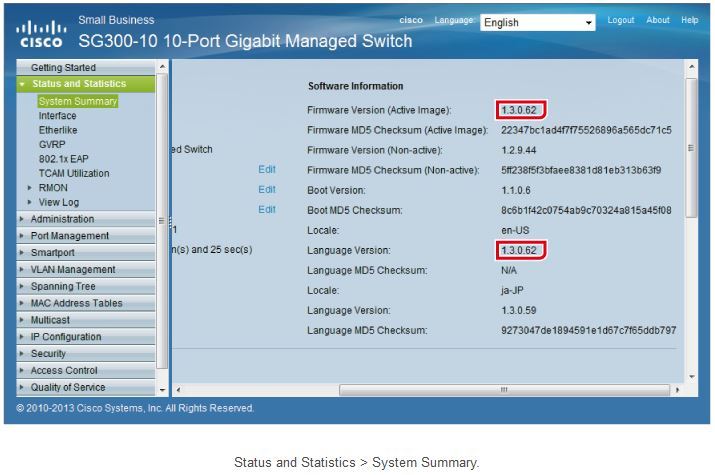
The following setup procedures were performed using SG300-10 firmware version 1.3.0.62. The default settings, and the like, may vary depending on the firmware version that you are using. When configuring a different managed switch, please note that the user interface and terminology vary for different manufacturers.
Preparing to Configure a Network Switch
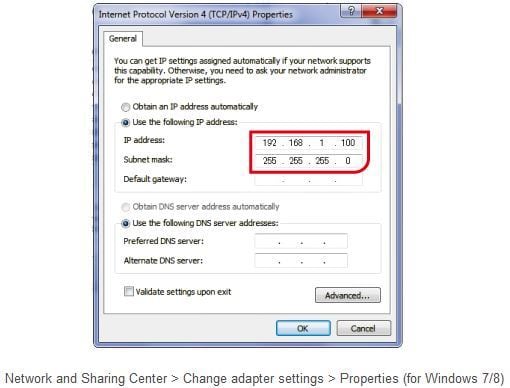
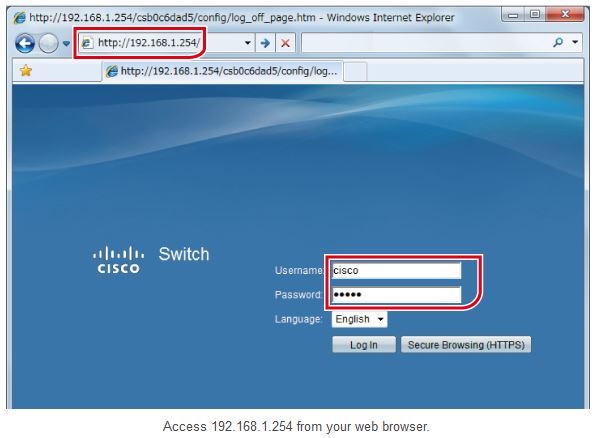
The simplest way to configure a switch is to access it from a PC web browser. Start your web browser, and enter the IP address of the switch. By default, the address of the switch is set to 192.168.1.254, and the username and password are both “cisco”. In the above case, you should set the IP address of the PC beforehand to 192.168.1.x (for example: 192.168.1.100) and set the subnet mask to 255.255.255.0.
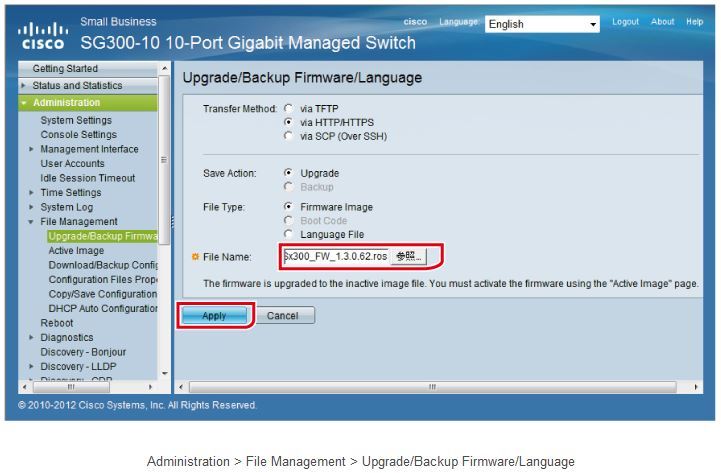
First, we recommend that you check the firmware (and the language file if required) version and update the firmware as necessary. Go to the Cisco website to find out what the latest version of the firmware is.
You can update the firmware by navigating to the following page. Before you update the firmware, be sure to download the firmware file (and language file if necessary) from the Cisco website. Please note that after you upload the firmware, you will need to activate the firmware and restart the switch.
We recommend that you change the switch’s IP address to 192.168.0.x (for example: 192.168.0.254). Yamaha PA devices also use 192.168.0.x for control network (not for Dante network) by default. The benefit of the same network address (192.168.0 in this case) is that both can be accessed from a single PC. Set IP Address Type to “Static”. In the IP Address box, type “192.168.0.254”, and then click “Apply”.
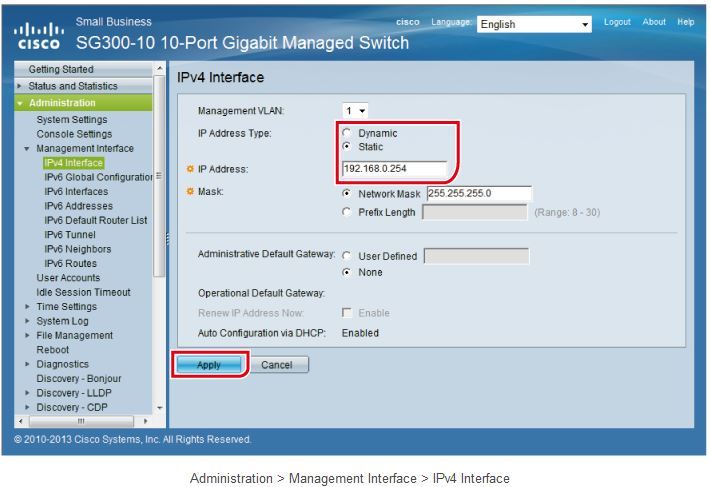
After you do this, the network address of the switch will change, and the connection with the PC will be lost. Remember to set the IP address of the PC to the same network address range (for example: 192.168.0.100) as the switch.
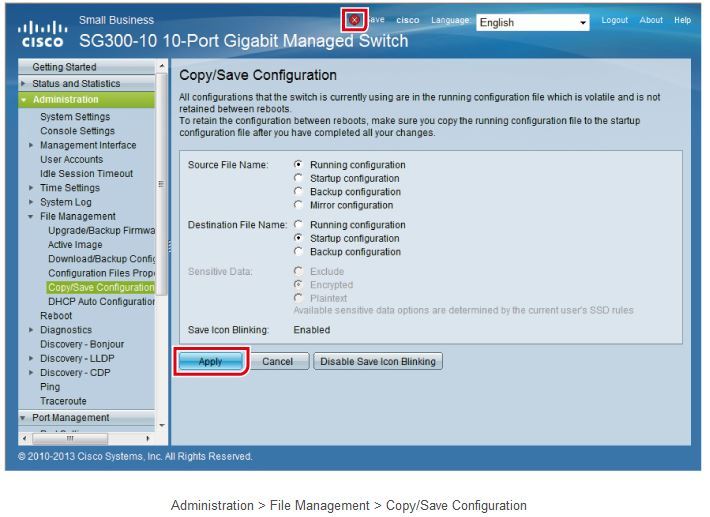
After you change the switch settings, remember to save them. If you turn off the power without saving the switch settings, all the settings you changed will return to their previous values. Since we changed the IP address, let’s save the switch settings.
When you change the settings, the word “Save” will blink at the top of the screen. Click “Save” to open the following page. Make sure that Source File Name is set to “Running configuration” and Destination File Name is set to “Startup configuration”, and click “Apply”.
The preparations for configuring the network switch are now complete.