MG Series
Downloading and Installing Drivers
Download and install the "Yamaha Steinberg USB Driver", which is required for the MG-XU series console to be recognized by the computer.
NOTE
- For specific installation instructions, refer to the included installation guide.
- For Mac computers, it is not necessary to download and install a driver.
Proceed to the next step.
Connecting an MG-XU series console to a computer
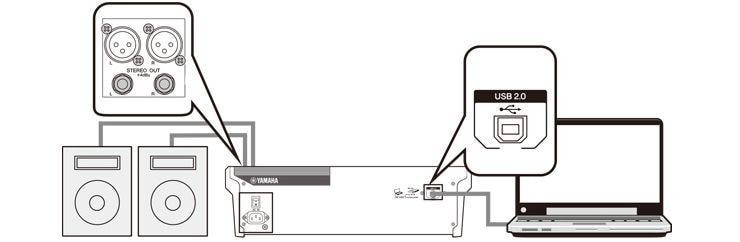
1. After installing the driver, use a USB cable to connect the MG-XU series console to a computer. Do not use a USB hub; connect the USB cable directly to the console and computer.
2. Turn on the power to the MG-XU series console. If you connected and turned on the console before installing the driver, leave the console powered on and install the driver now.
Confirmation after installation
1. Open [Device Manager] as described below. Click [Control Panel] -> ([Hardware and Sound]) -> [Device Manager].
2. Click the + sign to the left side of [Sound, video and game controllers].
3. Confirm that the names of your devices appear in the list.
This completes installation of the driver.
Settings and Basic Operations for the MG-XU Series
Computer Settings (Windows)
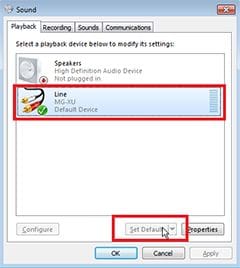
1. Click [Control Panel] -> [Sound], and then the [Playback] tab, and then select MG-XU and click the [Set Default] button.
2. Click the [OK] button.
Computer Settings (Mac)
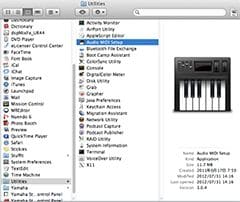
1. Select [Applications] -> [Utilities], and then double-click [Audio MIDI Setup].
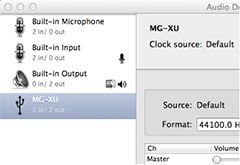
2. Select [MG-XU] from the list on the left side of the [Audio Devices] window. If the [AudioDevices] window is not displayed, in the menu select [Window] -> [Display Audio Window].

3. Control-click [MG-XU] in the list, and select [Use this device for sound output].
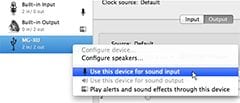
4. Control-click [MG-XU] in the list, and select [Use this device for sound input].

After completing steps 3 and 4, mic and speaker icons will appear next to MG-XU in the list.
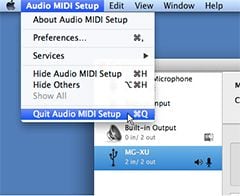
5. Quit Audio MIDI Setup.
This completes the computer settings.
Mixer Settings
1. Set the [LINE/USB] switch on the stereo channel to [USB].
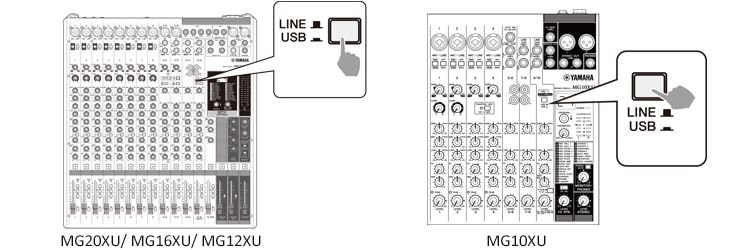
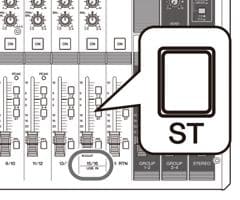
2. (For MG20XU/MG16XU/MG12XU) Press the [ST] switch for the stereo channel that you set to USB.
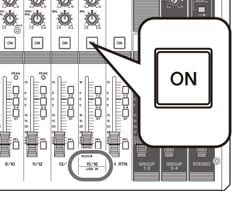
3. Turn on the stereo channel that you set to USB (except for the MG10XU), and adjust the level as necessary.