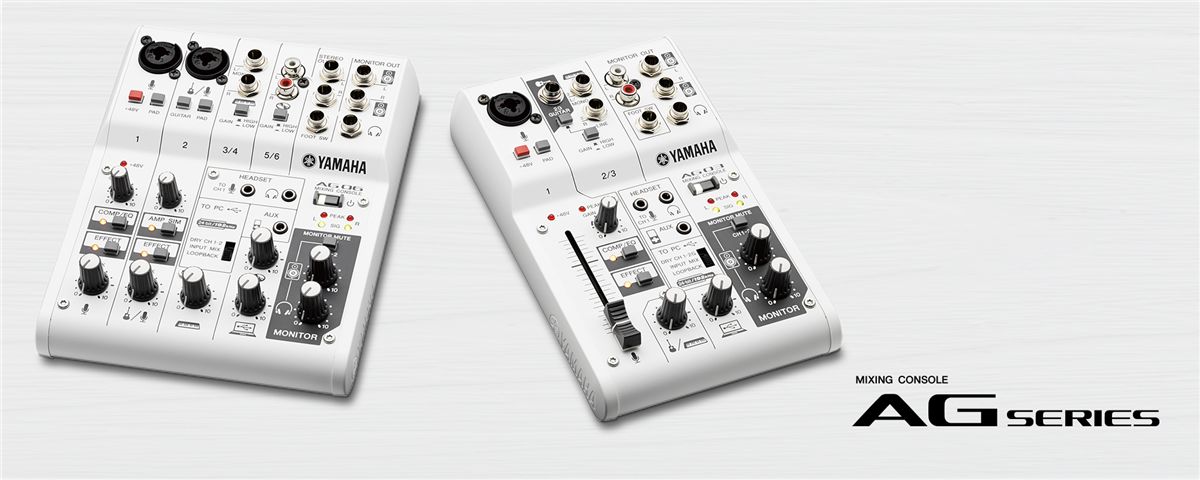
AG Series
Downloading the "Cubase AI" DAW software
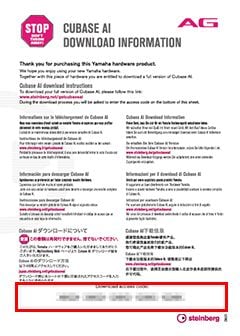
You can use the console together with DAW software for music production to record audio to your computer. AG series consoles come with an access code for downloading the "Cubase AI" DAW software. You can download this software with a computer connected to the Internet.
NOTE
If you use different DAW software or have already installed DAW software on your computer, proceed to the DAW software settings.
Procedure
2. Follow the on-screen instructions and enter the required information.
3. Click the link to the Cubase AI installer. The software download begins.
4. When downloading is complete, double-click the downloaded program. Software installation begins.
5. Follow the on-screen instructions to install the software.
6. When installation is complete, click the Exit button.
Music production
PC settings
1. Start the DAW software.
2. Open the window for setting the audio interface.
3. (Windows only) Set the DAW software driver to ASIO.
4. Make the following settings.
Windows
Set the ASIO driver to Yamaha Steinberg USB ASIO.
Mac
Select [AG06/AG03] as the audio interface to use.
Audio I/O settings
1. Set the I/O ports in the DAW software.
2. On the track(s) you want to record, select the input port connected to the AG series mixer.
If you do not own DAW software, you can use the access code included with your AG series console to download Cubase AI. Click here for more information about how to download and install Cubase software.
If you are using Cubase software, use the following procedure to make the necessary settings.
Mixer settings
1. Set the [TO PC] slide switch to [DRY CH 1-2].
The [TO PC] slide switch is used to select which source you want to record, such as an instrument or microphone connected to the mixer.
[DRY CH 1-2]: Records the "dry" mix (unaltered audio) of the source connected to channel 1 and channel 2. The mixer's built-in effects are not recorded.
[INPUT MIX]: Records a mix of the overall audio from the mixer. Use this setting when you want to record the audio signal with [COMP/EQ] and/or [EFFECT] turned on.
In most cases, it is common to set the slide switch to [DRY CH 1-2] to record the dry mix, and then make edits and other audio adjustments in the DAW software.
In this example, we have selected [DRY CH 1-2].

2. Turn [MONITOR MUTE] on.
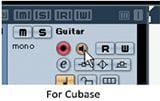
If you turn [MONITOR MUTE] on, audio input from channel 1 and channel 2 must pass through the computer before it can be heard. For example, if you are processing your guitar with effects in the DAW software, turning [MONITOR MUTE] off allows you to avoid hearing the dry signal from your guitar. On the other hand, if you are using external effects such as stomp boxes to create the guitar sound you are recording, turning [MONITOR MUTE] off allows you to hear the direct signal.
In the past, "latency" was a common problem because a delay would be introduced in the audio signal as it passed through the computer before reaching the monitors. Therefore, most people would listen to the input signal only when recording. However, due to recent improvements in computer performance, it is no longer necessary to be concerned with latency. It is now common to leave [MONITOR MUTE] turned on and listen to the audio that has been processed by the effects in the DAW software.
Signal path:
When you turn on the [MONITOR MUTE] button in the MONITOR section, you will not be able to directly monitor audio from mics, etc. inside the mixer. However, the audio signal is sent to the computer. Audio signals that pass through the DAW software on the computer are sent to the USB icon channel.
Driver settings
Driver settings (for Cubase software)
1. Make sure that all applications have been exited.
2. Use a USB cable to connect the mixer to the computer.
NOTE
(Windows only) Connect the USB cable to the same USB terminal used when installing the Yamaha Steinberg USB Driver. If you use a different USB terminal, you will need to install the Yamaha Steinberg USB Driver once again.

3. Double-click the Cubase series shortcut on your desktop to start the Cubase series application.
4. If the [Select ASIO Driver] window appears while the application is starting, make sure the AG series console is selected and then click the [OK] button. If this window does not appear, the application will start normally.
5. In the Cubase menu, select [Devices] -> [Device Settings].
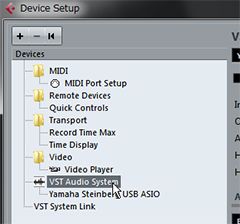
6. Select [VST Audio System] from the list on the left side.
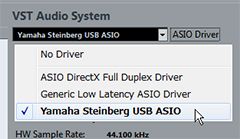
7. For ASIO driver, select [Yamaha Steinberg USB ASIO] (Windows)/[AG06/AG03] (Mac).
8. Click [OK].
Music production
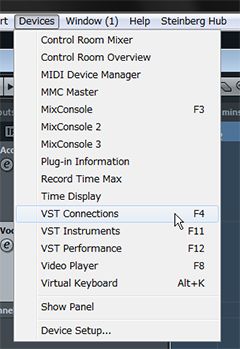
1. In Cubase, select [Devices] -> [VST Connections].
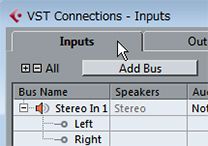
2. Click the [Inputs] tab.
3. If the device port with the bus name [Stereo In] is set to [Not Connected], click to set it to [AG06/AG03 - 1] (left) and [AG06/AG03 - 2] (right).
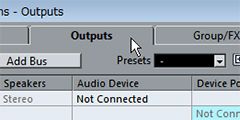
4. Click the [Outputs] tab.
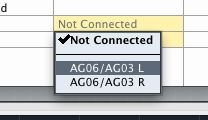
5. If the device port with the bus name [Stereo Out] is set to [Not Connected], click to set it to [AG06/AG03 - 1]
(Windows)/[AG06/AG03 L] (Mac) (left) and [AG06/AG03 - 2] (Windows)/[AG06/AG03 R] (Mac) (right).
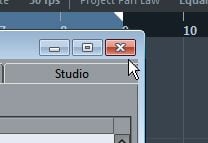
6. When these settings are complete, click the X mark in the top right corner to close this window.
This completes the settings.
Operations after making settings
1. Click the monitoring button in the DAW software.
You can hear the input audio signal via the DAW software.
2. Adjust the recording level in the DAW software.
If the [TO PC] slide switch is set to [DRY CH 1-2], the audio signal immediately after the [GAIN] knobs for channel 1 and channel 2 is sent to the DAW software. Therefore, you can use the [GAIN] knobs to set a suitable recording level in the DAW software. While playing the source audio, adjust the [GAIN] knobs so that the [PEAK] LED flashes only momentarily when the loudest sound is played. If the level is too high, the audio will distort while being recorded in the DAW software. On the other hand, there will be an increase in noise if the level is too low. Therefore, it is necessary to set the gain to a suitable level.
Set the level so that the [PEAK] LED flashes only momentarily when the loudest sound is played, and then turn the [GAIN] knob just slightly more to the left. This will ensure that there is no distortion in the recorded audio even if the performers play slightly louder while recording than during the sound check.
3. Use the [(USB2.0 icon)] level knob to adjust the overall volume as necessary.
Audio signals input from channel 1 and channel 2 are mixed together with the audio played back in the DAW software. Use the [ (USB icon)] level knob to adjust the overall volume. To adjust the balance of each individual part, use the mixer in the DAW software.